We will start with the same frame as in our Flush Framing tutorial, a simple 16' x 12' square frame.

To achieve an angled corner first cut the outside joist as shown. On your circular saw the angle will be 22.5 degrees (half of 45 degrees). If your saw tilts the wrong way (such that would require you to cut from bottom to top) do your best to cut it with a reciprocating saw. It is a good idea at this point to also cut the outside ply of your beam.

Place your carpenter's square across the top of the joists with the inside of the tongue (the short side) running across the inside of the bevel you cut on the outside joist. Mark a line where the tongue runs across the top of the second joist.

Measure the distance between the two joists. In this case the distance is 10". Transfer your mark 10" (or whatever your measurement is) out toward the front of the deck as shown.

Place your square on the top of the joists lining up with the inside of the bevel on the outside joist and the inside of the mark you just made. This creates a perfect 45 degree angle. Mark this angle across the top of the second joist and transfer that mark down the side of the joist.
Cut the excess off the end of the second joist. Similar to the outside joist, depeding on which way your saw tilts you may have to either cut from the bottom up or use a reciprocating saw.

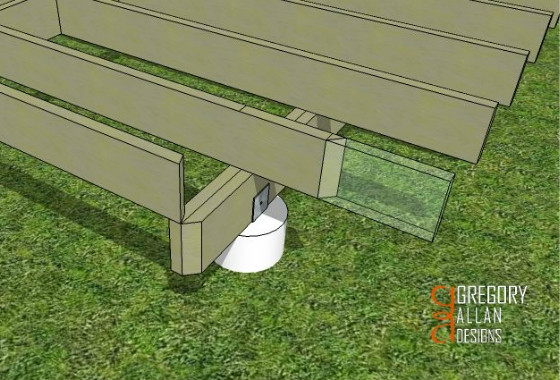
Cut a piece about 28" long with a 22.5 degree angle on one end. Since our maximum overhang is 16" this should be lots. If you are able to have a longer overhang be sure to cut this piece longer to allow for that.

Now you can lay your decking boards. Since we will want a flush final deck board, stop decking once you are one deck board past the beam.

Measure and mark 16" from the front of the beam onto the corner fascia piece. Transfer that measurement up to the top of the joist. Measure from the face of your last deck board to this line. In this example it is 12 1/8".

To determine exactly where our framing will end measure from the front edge of one deck board to the front of the next. Repeat this for two and three deck boards as illustrated. Since the maximum space we have is 12 1/8", 11 1/2" is the best fit for this example. Therefore we can only add two more boards.

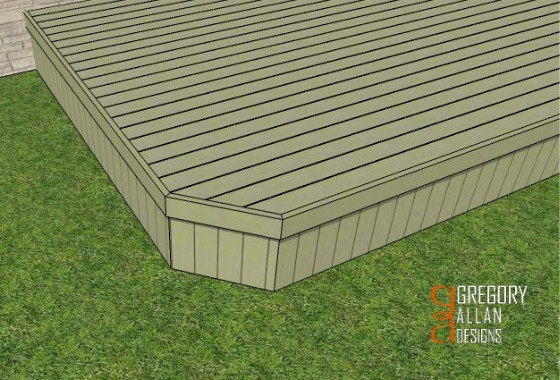
And done. Looks as good as it functions, and it wasn't too hard after all!
Framing Angled Corners
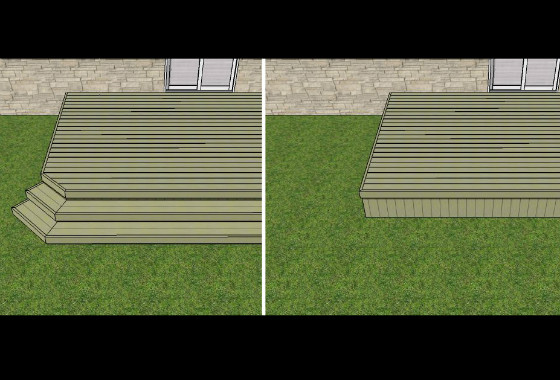
Forget a plain box! In this tutorial you will learn how to put "cut corners" on a deck. This will elevate the overall look of your deck, and when combined with steps that wrap around said corner, will create a strong impact that looks awesome! Please note that for this example we have 2 x 8 joists on 16" centers, and will leave an overhang of no more than 16" from the front of the beam to the fascia. In my municipality that is the maximun overhang allowed for 2 x 8 joists. That may differ in your local area so pleaes always check with your building department!
To navigate through this step by step guide, hover over each picture and click on the " i " button for an explanation of each step.